This article explains how to generate configuration files required for scanning Microsoft365 and Google cloud services with Actifile.
There are two ways to generate configuration files for cloud apps.
- If you have admin access to an Azure account, you can register the Actifile agent as an application in your tenant, allowing it to scan Microsoft services (OneDrive, SharePoint, Outlook) across the entire tenant.
- If you need to scan Google services or particular users’ Microsoft accounts, you can download a separate configuration file for each account.
Register Actifile Agent in Azure tenant
Step 1. Download the registration script and save it to an accessible location. You configuration files will be generated in this folder.
Step 2. Open PowerShell and navigate to the folder containing the script. Run the following command, replacing the placeholder with your Actifile install key:
.\actifile-app-registration.ps1 -InstallKey YOUR_INSTALL_KEY
Step 3. This command will open a web browser with a login dialog for Microsoft Azure. Please select an account with sufficient permissions to create an application in the tenant.
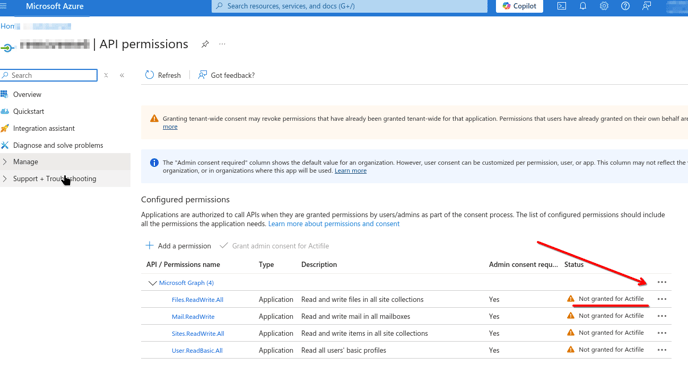
Step 4. Once the process is complete, a link to the registered application will be displayed, along with the permissions that require your Azure administrator’s approval.
Note: You won’t be able to deploy the agent until your Azure admin grants the necessary permissions.
Note: These files contain secret keys that grant access to all files and emails within the tenant.
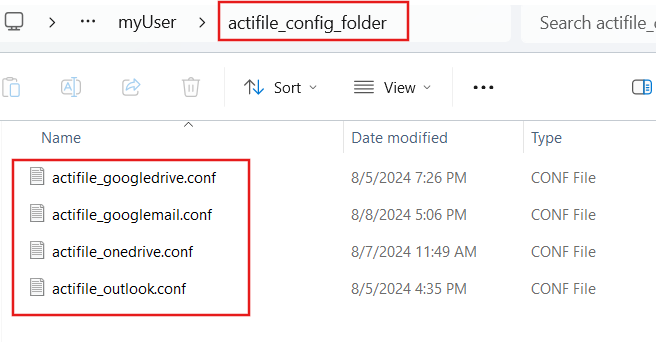
Step 5. Check the folder where you saved the script in step 1. You should see two files: actifile_onedrive.conf and actifile_outlook.conf.

Step 5. After the administrator has granted the necessary permissions, the page should look like this:

You are ready to scan all Microsoft services within your organization with the Cloud & NAS Agent.
Download config files for individual accounts
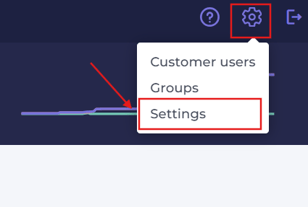
Step 1. Go to my.actifile.com and log in to your account. Click the gear icon in the top right corner of the screen and select Settings.
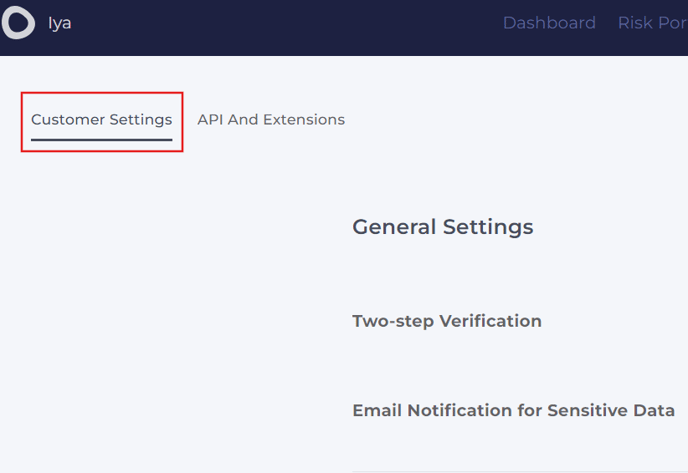
Ensure you are on the Customer Settings tab.
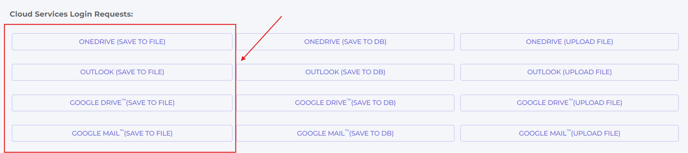
Step 2. Scroll down to the Cloud Services Login Requests section and click Save to File for the desired app. Log in to the app with the credentials of the user having access to the files you wish to scan with at least Read permissions.
Step 3. Download the actifile_APP_NAME.conf file and save it to the folder you created in step 1.
Step 4. Repeat the procedure for all the apps you wish to scan. Save all the actifile_APP_NAME.conf files in the same folder.
You are ready to start scanning your cloud storage with Actifile.