This guide covers installing, configuring, and uninstalling the Actifile agent on Mac, including permission setup and verification in the Actifile portal.
Installation
Step 1. Go to my.actifile.com > Deployment > Installation and click Download for Mac to get the Actifile agent installer.
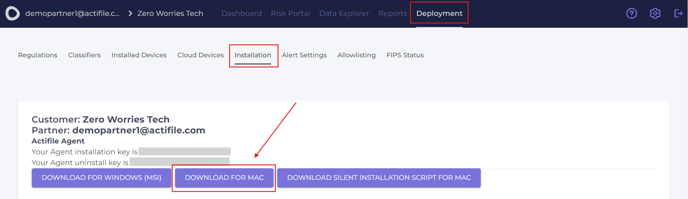
Step 2. Unzip the downloaded folder and double-click the ActifileMacAgentInstaller file. Enter the Agent Installation key and click Install. If you need help finding your Agent Installation key, check out this article.

Step 3. Once the installation is completed, a pop-up window will appear, prompting you to give Actifile the necessary permissions. Click on the Enable button next to Full Disk Access.

If the window hasn’t appeared, open your device’s System Settings and select Security & Privacy > Full Disk Access.

Step 4. Find the almond program and toggle the switch next to its name to give it permission to access your data. Enter your Mac user password to allow changes.
-1.webp?width=688&height=674&name=unnamed%20(5)-1.webp)

Step 5. Go back to the pop-up window and click the Enable button next to Accessibility.

Otherwise, switch to the Accessibility tab in the System Settings.

Step 6. Find the UserAgent and toggle the switch to give it the necessary permissions.
-2.png?width=688&height=675&name=unnamed%20(1)-2.png)
Step 7. Go to Deployment > Installed Devices. Your device will appear in the list under your Mac device name and MacOS user account name.
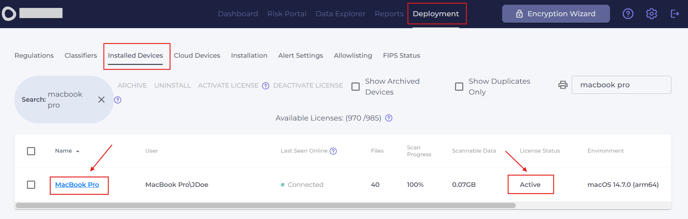
You are ready to start using Actifile on your Mac device.
Uninstallation
- To uninstall the via the Actifile portal, refer to these instructions.
- To remove the agent using the ActifileMacAgentInstaller, follow the steps below.
Step 1. Open the ActifileMacAgentInstaller you used to install the agent. Enter your Agent Uninstall key > click Uninstall. This article explains where to find your uninstall key. If needed, enter your Mac password.
-2.png?width=688&height=354&name=unnamed%20(2)-2.png)
Step 2. Navigate to Deployment > Installed Devices. Your device will appear in the list as uninstalling or uninstalled. The uninstallation process may take some time to complete.
